Dairy Free for Digestive Health: Do You Need to Go Dairy Free?
Note: This article contains affiliate links, which give me a small commission on items you purchase by clicking these links, with no additional cost to you.
At the beginning of my healing journey, instead of doing a basic elimination diet to go gluten and diary free, I chose to use the keto diet as my template. During my keto time, I relied heavily on dairy products to provide my needed fats. I didn’t know that this was going to be recipe for disaster…
Many of my hormonal and endometriosis symptoms flared over the first 9 months, and got drastically worse. And I didn’t notice right away that my fat digestion wasn’t up to snuff when it came to dairy (I wish I had already studied nutrition before I committed this act of unintentional self-harm!)
It’s easy to eat dairy many times a day. We might have milk or half-and-half in our coffee, milk in our cereal or pancakes for breakfast, cheese for a snack or with our lunch sandwich, and cheese as a topping on our dinner. Salads often are topped with cheese garnish or creamy dressings. And desserts and treats are another common source of dairy products.
Though dairy foods can be important and nutritious parts of a whole foods diet, the constant flow of dairy products can mask their true effects: many of us are sensitive to dairy and need to go dairy free.
In fact, dairy products are one of the top three food intolerances, and for this reason, I usually recommend that my clients do a trial period without dairy products when we begin working together. Once we complete this elimination, we can test the various forms of dairy to see which ones you react to.
It’s important to understand how and why dairy can be inflammatory, and to figure out if YOU are dairy-sensitive if you are working on improving your digestive or other health challenges. Many of you may need to go dairy free to get a handle on your health.
Let’s explore why you might try going dairy free.
What is Dairy and Dairy Free?
Dairy refers to products that come from or are made from animal milk. This includes:
- Butter and ghee
- Milk and milk powder
- Cheese
- Yogurt
- Kefir
- Cream and Half and Half
- Ice Cream
- Sour Cream
Dairy can also include ingredients that are sourced from milk, such as whey protein powder, casein, lactose, hydrolyzed casein, calcium caseinate, caseinate, iron caseinate, lactalbumin, lactoglobulin, lactulose, magnesium caseinate, potassium caseinate, rennet casein, sodium caseinate, whey protein hydrolysate, and zinc caseinate.
Dairy free refers to eating a diet without any dairy or dairy-derived products.
Why Go Dairy Free? Effects of Dairy on Your Body
There are several types of sensitivities to dairy. Your strategy for moving forward will depend on which type of intolerance you have.
Dairy Allergy
A dairy allergy would be characterized by a severe allergic reaction to dairy consumption, including swelling of the mouth, tongue, and throat, difficulty breathing, unconsciousness, and dilated pupils. This type of reaction, sometimes called anaphylaxis, is caused by a sudden and acute response of IgE antibodies and the release of histamine on a massive scale to an allergen.
If you are sensitive to dairy in this way, you likely already know it and avoid it. This is actually a pretty rare type of dairy reaction, though it does happen.
Lactose Intolerance
Lactose intolerance is a dairy sensitivity where the body does not have the enzyme lactase to adequately break down lactose, or milk sugar. Lactose intolerance can be quite uncomfortable, causing:
- Intestinal cramping
- Diarrhea, bloating
- Gas and flatulence
- Gurgling sounds in the belly
- Vomiting
Most of you who suffer from lactose intolerance likely also know this about yourselves, as the symptoms are usually quite uncomfortable. It’s estimated that approximately 30-50 million Americans are lactose intolerant.
Casein Sensitivity
Casein is the protein in milk. Some people are sensitive to this protein, either because their leaky gut has allowed casein to be tagged by the immune system for destruction, or because of an innate sensitivity. Possible symptoms are:
- Bloating and gas
- Swelling and pain in joints or muscles
- Nausea or vomiting
- Diarrhea
- Constipation
- Skin itching or inflammation, such as eczema
- Fatigue
- Sinus and breathing issues, such as asthma, wheezing, coughing
- Headaches
These latter two sensitivities can cause inflammation in the digestive tract, which can contribute to wide-ranging symptoms throughout the body. Inflammation from dairy in the large intestine can impede the absorption of minerals.
Many people who are gluten sensitive, especially those who have celiac disease, are “cross-reactive” to casein, the milk protein, because the casein protein is chemically similar to gluten.
A1 vs A2 Casein Sensitivity
Milk protein from northern European cow breeds, including Holstein, Friesian, Ayrshire, and British Shorthorn cows, contains mostly A1 casein, while milk proteins from the southern European breeds including the Guernsey, Jersey, Charolais, and Limousin cows mostly contains the A2-type.
Because milk is blended from many dairies and breeds, most regular milk contains both types of casein, but A2 milk, available in some stores, only contains the A2 casein (milk protein.) Some people are sensitive to one but not the other, and find they can tolerate the A2 milk just fine. This is also the reason why some people tolerate goat milk but not cow milk. Goat milk never has A1 casein.
So if you find that you react to milk but not other dairy products, it might be worth a trying an A2-type milk to see if you fare any better.
Other Sensitivity Issues with Dairy
Besides these sensitivities, dairy can also impact your hormones. This is because milk, no matter the quality or source, comes from either lactating and/or pregnant animals, and therefore contains estrogens and other hormones. These hormones can disrupt the balance of hormones in our own bodies, and contribute to menstrual changes, acne, PMS, infertility, mood swings, pain, inflammation, and more.
Non-organic milk may also contain additional growth hormones, or lactation-stimulating hormones, as well as antibiotics, and residues of glyphosate and other chemicals in the feed the cows ate. Because toxins bio-accumulate in fat, milk is a reservoir for such chemicals. This chemical intake can damage our sensitive digestive tracts, just like glyphosate and gluten.
Dairy can also in some people be responsible for creating mucous in the digestive tract, if it’s not digested well, which can negatively affect your digestion and create irritation in the wall of your gut.
Should I Go Dairy Free?
The best way to evaluate whether or not dairy is contributing to your symptoms is to try eliminating it for several weeks, and then to carefully reintroduce it to see if you notice any symptoms.
I generally recommend eliminating gluten, dairy, and sugar (including alcohol) for 30 days as a basic elimination diet, as these are the top three inflammatory foods that may be contributing to your symptoms.
After you’ve eliminated these foods for 30 days, you can begin testing each one in turn, and using a Food-Symptom Diary (you can grab mine here) to track your body’s response. The key thing here is to only test ONE food at a time, and to wait 4 days until trying something new.
When reintroducing dairy products, it’s helpful to test each one that you regularly eat one at a time. So in other words, you might test butter first, but then wait four days, then test yogurt, and wait a few more days, and then test cheese. Each dairy product is unique, and you may find that you tolerate some better than others.
If your body shows symptoms within 3-4 days of eating the item, it’s probably best to continue to leave it out while you work on understanding what else is happening to create that sensitivity.
(If you need help learning about how to do an elimination diet, check out my video How to Do an Elimination Diet for IBS).
Dairy Free Substitutes
OK, so you can’t have dairy, and you’re panicking a little about what you’ll do without cheese? Let’s talk about some ways to crowd out dairy products, so you don’t feel deprived.
- Milks There are many milk substitutes out there on the market. Try almond, hemp, rice, macadamia, or cashew. I don’t recommend soymilk, because most soy is GMO and likely contaminated with glyphosate, and is often also a reactive food for many people. It can also have some undesirable effects on hormones. Homemade is better than store bought, if you can find the time to make it.
- Healthy Fats Try coconut oil, extra virgin olive oil, and avocado oil instead of butter. Coconut oil with a little salt is delicious on toast. If you choose a non-dairy butter substitute, make sure it is free of hydrogenated oils.
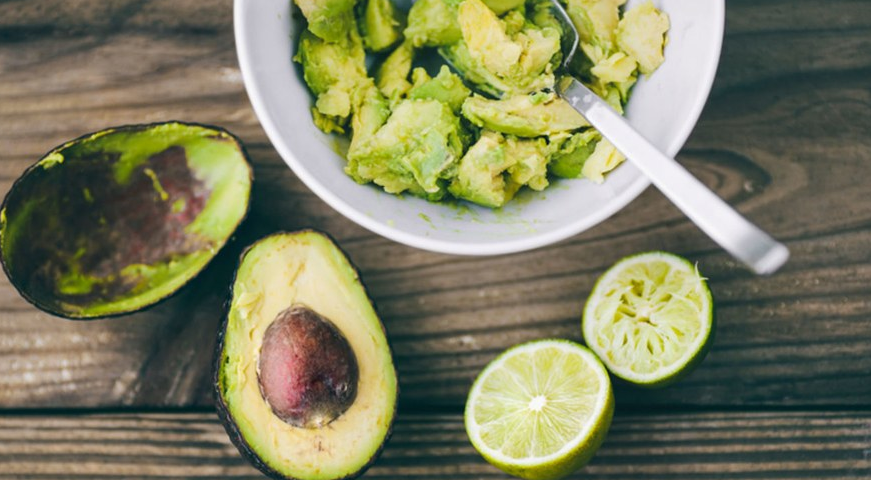
- Creamy foods Satisfy your craving for creamy foods with spreads such as guacamole, tahini sauce, nut butters (almond, peanut, sunflower, cashew), coconut cream, coconut milk, coconut or cashew yogurt. And don’t forget about mayonnaise/veganaise, or hummus.
- High Calcium Foods Many people are concerned about the lack of calcium when giving up dairy. There are many foods that can provide adequate calcium such as sardines with bones, sunflower and sesame seeds, almonds, broccoli, collard greens, bok choi, oranges, white beans, black-eyed peas, and kelp.
What to Expect When You Go Dairy Free
As with any elimination diet, expect some cleansing reactions, and possibly uncomfortable symptoms while your body clears a backlog of inflammation and your gut flora readjusts to life without dairy.
- Fatigue
- Bowel Changes Many of the symptoms of dairy sensitivity are related to the digestive system. You may become less constipated, or your bowels may clean out as they are able to deal with the backlog of inflammation. Stay well-hydrated and trust the process. This should clear within a few days.
- Cravings As with gluten, dairy contains caso-morphins, morphine-like compounds that mimic the effect of morphine in the brain. You can be quite addicted to our dairy products, and can experience a withdrawal when you stop eating them. Observe what this tells you about your relationship with dairy, and consider how you would like it to change. Be ready to crowd out your craving with healthy substitutes. You can also try using the amino acids L-glutamine or DPA (d-phenylalanine) with a glass of water on the tongue when the cravings are active. (For more on this subject, check out Trudy Scott’s blog about how to use individual amino acids for craving relief.)
- Mood swings Related to the cravings and withdrawal symptoms, you may find you feel a little emotionally tender. Remember to warn your loved ones and coworkers that you may be a little off during the first week you go dairy free. Know that the mood effects will pass, and you will likely feel more balanced and in control than you have in a long time.
- Flu-like Symptoms, like aches, chills, sweats, and nausea.
- Weight Loss Often, dairy sensitivities can lead to bloating and water retention. When the dairy disappears, the body can release that water, and begin to heal the intestines. Weight loss can be a side effect. Make sure to weigh yourself at the beginning of your elimination diet so you can celebrate your wins at the end.
- Improved Skin As with weight, skin issues are common symptoms with dairy sensitivities. Observe your skin during the month as your body adapts to life without dairy.
- Improved Digestion Many of the common symptoms related to dairy sensitivity are digestive. Keep a close eye on your digestion, and note any positive changes, such as less bloating, less constipation or diarrhea, and less gas
Caveats with Going Dairy Free
- Pre-Made Nutmilks: Many pre-made nutmilks in the store have added sugars, and other ingredients that don’t have a place in a whole foods diet. Read your labels carefully. If you can’t find one with the right ingredients, buy a nutmilk bag (this one is 100% organic cotton) and try the Nut Milk Recipe (at the end of this article).
- Avoid Soy-Based and Processed Dairy Substitutes: There are many dairy-free mock cheeses and other dairy products out there, but many of them are full of processed ingredients. Many are based on soy. As I mentioned earlier, it’s best to avoid soy-based products, due to the likely GMO content, as well as non-real-food ingredients. Stick to healthy, real-food substitutes instead.
- If you find that you don’t react negatively to dairy, there’s nothing wrong with including dairy products in your diet. The main thing to focus on is to buy grass-fed, organic dairy products to minimize your exposure to the toxic chemicals and hormones present in conventional milk and milk products.
Dairy Free Wrap Up
It’s really quite common for dairy products to cause or contribute to inflammation and symptoms, and for this reason I recommend to all of my clients to at least go dairy free for a short while to see if it is causing problems.
Of course, going dairy free is one small piece of a larger puzzle of discovering your unique food-symptom triggers, and investigating any other underlying causes of your symptoms.
If you’ve been struggling with how to make sense of all the special diets and recommended supplements you’ve read about, I’m here to help. As an expert in helping people understand their unique food triggers, I invite you to download your free copy of Roadmap to Gut Recovery, which will help you see your big picture road to feeling better.
When you’re ready for some one-on-one help, schedule a free 30-minute assessment session with me. I’ll help you start walking that road to gut recovery. Together, we can get you feeling well again.
Here’s that Homemade Nutmilk Recipe I promised:
HOMEMADE NUT MILK Makes approximately 4 cups
2 cups raw almonds, cashews, macadamia nuts, or similar
½ cup dates
½ tsp. sea salt
4 cups water
Place nuts in a bowl and soak overnight. Pour nuts into a colander and rinse. Place the soaked nuts into your blender or food processor. Add the remaining ingredients and blend well. Be careful not to over blend. You don’t want to completely pulverize the nuts.
Pour this blended mixture into a nut milk bag (here’s the one I use), or sieve, set over a bowl. Squeeze the liquid through the nut milk bag, or press with hands or a tool in the sieve. Store in a glass jar in the refrigerator. Nut milk will keep for a few days.


